
Install Smokin Kodi Build on Any Device: This walkthrough keeps the Smokin build install straightforward and mercifully drama-free, because no one signs up for a Kodi setup marathon. The screenshots come from Windows 11, but the steps behave the same across the usual lineup—FireSticks, Fire TV Cube, Android TV, Windows 10, macOS, Linux, even mobile devices tagging along. Smokin hits its stride on Kodi 19 Matrix, where everything feels smooth and settled; it can run on Kodi 20 Nexus, but that’s more of a roll-the-dice situation depending on the setup. If Nexus is the long-term choice, sticking with builds made specifically for Kodi 20 is the calmer, smarter path—less tinkering, fewer sighs, and no late-night troubleshooting spiral.
Kodi addons and builds can feel like an all-you-can-eat buffet for movies, shows, and sports—but let’s be honest, that buffet isn’t always squeaky clean.
When you stream freely, your IP is out there for anyone to see, and that’s where things get uncomfortable.
Governments watch, ISPs slow you down, and suddenly that “free” stream doesn’t feel so free anymore.
That’s why using a solid VPN with Kodi just makes sense.
It keeps your identity tucked away, slips past geo-blocks, dodges ISP throttling, and usually turns buffering into a distant memory.
Not paranoia—just basic digital street smarts.
After bouncing between VPNs and dealing with the usual slowdowns and sketchy promises,
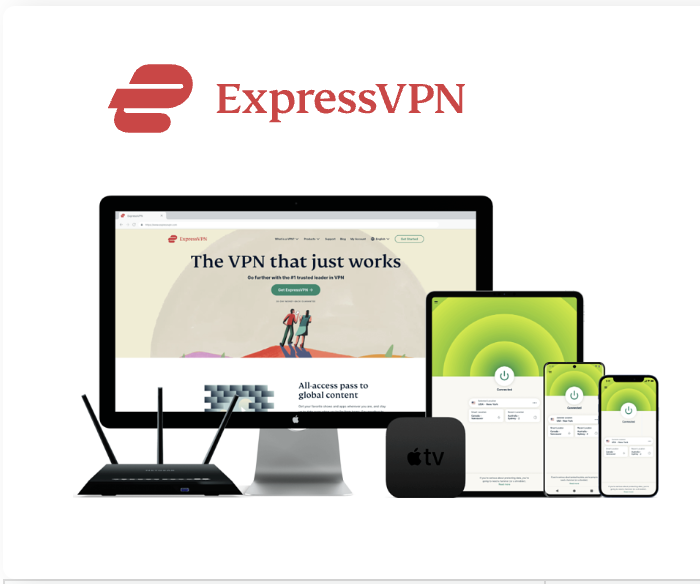
ExpressVPN just stuck.
It’s fast, solid on security, and doesn’t make setup feel like a side quest—FireStick included.
The deal helps too:
three free months,
a big cut on the annual plan, and a 30-day money-back guarantee that actually means what it says.
Worst case? Try it, hate it, get your money back.
Best case? Forget you’re even using a VPN—and that’s kind of the point.
What is the Smokin Build for Kodi?
Smokin does exactly what the name hints at—it gives Kodi a full makeover with a fresh skin and a cleaner, more modern layout that actually feels nice to use. It comes loaded with a solid lineup of well-known streaming addons like Twisted, Homelander, Rising Tides, The Crew, Scrubs V2, Mad Titan Sports, The Loop, and plenty more, so there’s no scavenger hunt required after install. The build stays lightweight, avoids unnecessary clutter, and keeps navigation simple, which is a relief and a big win for Kodi newcomers. Everything lives inside the third-party Doomzday repository, making Smokin a tidy, beginner-friendly way to level up Kodi without overcomplicating things.
Privacy Alert! Your data is exposed to the websites you visit! The information above can be used to track you, target you for ads, and monitor what you do online. We recommend ExpressVPN — the #1 VPN out of over 350 providers we've tested. It has military-grade encryption and privacy features that will ensure your digital security, plus — it's currently offering 48% off. Your IP Address: Loading...
 Your Location: Loading...
 Your Internet Provider: Loading...
Is Smokin Build Safe and Legal?
From hands-on use, Smokin looks clean and problem-free—running it on a system with active antivirus hasn’t triggered so much as a raised eyebrow, and a VirusTotal scan of the Doomzday repository came back empty on threats, which is usually a good sign. That said, nothing unofficial comes with a stamped guarantee, so this is more “no red flags spotted” than a pinky promise of perfection. The legal side is murkier: Smokin bundles well-known unofficial Kodi addons that pull streams from sources that aren’t always easy to verify, and some of those providers may not hold proper licenses. There’s no cheering for piracy here—just realism. If streaming wanders into a gray area, a solid VPN like ExpressVPN adds a layer of privacy and peace of mind, which honestly feels like basic internet hygiene at this point.
How to Install the Smokin Build on Kodi
Since Smokin is a third-party Kodi build, it isn’t available in Kodi’s official repository. Instead, you’ll install it from an unofficial source called the Doomzday repository. Installing builds from third-party sources can be a bit more involved than official ones, but don’t worry—I’ve broken down the process into simple steps. You’ll have Smokin up and running on your device in just a few minutes. Let’s get started!
Part 1: Enable Kodi to Install Third-Party Builds
Kodi blocks installations from unknown sources by default for security reasons. To install the Smokin build, you need to allow installations from third-party sources. Here’s how:
- On the Kodi home screen, tap the little cogwheel in the top-left—aka the gateway to all the serious stuff.
- Open System from the Settings menu and pretend this isn’t where things usually go wrong.
- Slide over to Add-ons on the left, then spot Unknown Sources on the right—it’s almost always switched off.
- Flip it ON and accept the tiny moment of rebellion.
- A warning pops up to sound dramatic—click Yes, move on, and keep the build journey rolling.
You have now configured Kodi to allow third-party builds. Let’s move on to installing the Doomzday repository.
Part 2: Installing the Doomzday Repository
Next, you’ll add the source URL to download the Doomzday repository, then install it and the Doomzday Wizard, which hosts the Smokin build.
You’re now ready to install the Smokin build.
Part 3: Installing the Smokin Build on Kodi
Follow these final steps to get the Smokin build installed:
That’s it! You’ve successfully installed the Smokin build on Kodi.
Best VPNS For Streaming Safely
1. ExpressVPN — Best VPN With the Fastest Speeds for Smooth Streaming
Best Feature
The fastest speeds we tested, ensuring you can stream, browse, game, and torrent without interruptions
Server Network
3,000 servers in 105 countries give you fast worldwide connections
Simultaneous Device Connections
Up to 8, so you can protect your compatible devices under one subscription
Works With
Netflix, Disney+, Amazon Prime Video, BBC iPlayer, (HBO) Max, Hulu, Vudu, DAZN, and more
2. NordVPN — Best VPN With the Fastest Speeds for Smooth Streaming
![]()
Best Feature
High security features and fast speeds for a reliable connection
Server Network
5,400 servers in 60 countries for improved accessibility and connection speeds
Simultaneous Device Connections
Up to 6 devices, suitable for protecting multiple devices simultaneously
Works With
Netflix, Disney+, Amazon Prime Video, BBC iPlayer, (HBO) Max, Hulu, Vudu, DAZN, and more


Before You Start Streaming with Kodi Addons or Builds
Anything streamed on Kodi isn’t as private as it feels—ISPs can see it, and so can government agencies, which is a mildly terrifying thought when all you wanted was to relax with a show. The tricky part is that the internet is a gray zone: legit and sketchy sources often look identical, and nobody’s perfect at spotting the difference every time. That’s why a VPN feels less like a “sneaky tool” and more like digital common sense—an extra hoodie pulled up in a very public place. ExpressVPN has been the go-to here: fast enough to forget it’s even on, solid on security, and drama-free across streaming apps and devices. This isn’t about encouraging copyright nonsense; it’s about privacy, avoiding throttling, dodging geo walls, and having a safety net for those “wait… was that source actually legit?” moments. Call it cautious, nerdy, or slightly paranoid—but in today’s internet, that’s just being realistic.
How to Get VPN Protection on Kodi in 3 Simple Steps
- Subscribe to ExpressVPN. They offer a 30-day money-back guarantee, so it’s basically a free trial if you’re the cautious type. Honestly, most people stick with it because it just works.
- Get the app on your device. Click [HERE] to download. FireStick users, skip ahead to Step 5 for the FireStick-specific route.
- Open the app and connect. Hit the Power icon, and boom—your connection is secure, private, and slightly smug-feeling.
- FireStick users, start here if not already subscribed. Make sure you have an active ExpressVPN account.
- From the FireStick home screen, select Find → Search. Think of it as sending your FireStick on a little treasure hunt.
- Type “ExpressVPN” and select it. The search bar is your magic portal here.
- Click Download. Let it install—this is the part where patience actually pays off.
- Open ExpressVPN and sign in. Use the email and password from your subscription. No brain gymnastics required.
- Hit the Power icon to connect. Your FireStick is now wrapped in one of the fastest, slickest VPN shields out there. Streaming safely never felt this satisfying.
How to Use the Smokin Build on Kodi
Once the Smokin build is installed, open Kodi and let it take a minute to get its bearings. The first launch is a test of patience—updates start sneaking in, little prompts blink at the top like a jittery assistant double-checking everything, and it’s oh-so-tempting to start clicking around immediately. Resist the urge. Let it take its time getting set up—jumping ahead usually just ends in confusion and a few frustrated groans. The wait drags a bit, like watching paint dry on a humid day, but once it’s done, everything clicks into place, flows smoothly, and the build finally feels like it belongs instead of some half-finished project gathering dust in the corner.
Exploring the Smokin Build Interface
The home screen puts a big, easy-to-spot main menu bar at the bottom, with a smaller submenu right beneath it that shifts depending on what’s highlighted. Flick through the main categories—Movies, Shows, Music, Sports, and the rest—and the submenu updates to match, showing all the relevant addons Smokin bundled in. Pick Movies, for instance, and you’ll see fan-favorites like Homelander, Scrubs V2, Rising Tides, and The Crew ready to go. For the full lineup of pre-installed goodies, head over to Apps in the main menu and check out Video Add-ons in the submenu—nothing hidden, just laid out, which is a relief when setups usually feel like scavenger hunts.
Additional Tips
At first, Smokin feels a little disorienting—trending and recommended videos are nowhere to be seen, which makes the Movies menu feel almost empty. A quick tap of the Up key magically brings everything back, and suddenly it all clicks. The setup is surprisingly clean and simple, no labyrinth of menus or secret handshakes needed, which is honestly a relief. It’s not perfect—sometimes menus lag or a glitch sneaks in—but it’s easy enough to muddle through without losing your mind, and if something’s unclear, dropping a comment usually gets a quick answer. There’s a charm in that simplicity, like a slightly messy but cozy space that just works once you poke around a bit.
How to Sign In to Real Debrid
If you’re new to Real Debrid and want to learn more or get a subscription, visit their official website.
To use Real Debrid with the Smokin Kodi Build, follow these steps:
- From the Smokin Build home screen, highlight System/Settings in the main menu. Then, click Settings in the submenu. Next, select System on the following screen.
- Select Add-ons, then choose Manage Dependencies.
- Scroll down and click on ResolveURL.
- In the ResolveURL dashboard, click Configure.
- Select Universal Resolvers 2, then click ReAuthorize My Account.
- A popup will appear on Kodi displaying a code. Visit https://real-debrid.com/device and enter this code to authorize the Smokin Build.
Best VPN deals this week:
Wrapping Up
Finally got the Smokin Build on Kodi, and wow—it actually makes the interface feel like it wants to be used. No more fumbling through messy menus or hunting down random addons like a scavenger hunt. There’s a quietly satisfying, nerdy joy in having it all just work, even if it stumbles a bit along the way. There’s something satisfying in having a setup that works out of the box without hours of fiddling, like the nerdy version of hitting a cheat code—but, of course, nothing’s ever perfect, and that tiny chaos sneaks in just enough to keep it interesting.
Best VPNs for Streaming — Final Score:
| Rank | Provider | Overall Score | Best Deal | |
|---|---|---|---|---|
1 |
|
9.8 ★★★★★ |
save 84% | VISIT WEBSITE > |
2 |
|
9.6 ★★★★★ |
save 83% | VISIT WEBSITE > |
3 |
|
9.4 ★★★★★ |
save 84% | VISIT WEBSITE > |

